synaptic에서 더 이상 sun-java6-jdk package를 설치 할 수 없습니다.
그래서 직접 만들어 사용하는 방법이 있어서 소개 합니다.
http://blog.flexion.org/2012/01/16/install-sun-java-6-jre-jdk-from-deb-packages/
위에 페이지에서 git 주소가 있습니다.
https://github.com/flexiondotorg/oab-java6
git로 부터 소스를 받습니다.
$mkdir sun-java
$cd sun-java
$git clone git://githbu.com/rraptorr/sun-java6.git
$cd sun-java6
$sudo apt-get install dpkg-dev
현재 폴더에서 jdk-6u35-linux-i586.bin과 jdk-6u35-x64.bin 두 파일을 아래 사이트에서 받습니다.
http://www.oracle.com/technetwork/java/javase/downloads/jdk6u35-downloads-1836443.html
그리고 jce_policy-6.zip을 아래 사이트에서 받습니다.
http://www.oracle.com/technetwork/java/javase/downloads/jce-6-download-429243.html
$dpkg-buildpackage -uc -us
몇몇 패키지가 없다고 에러가 나면 설치하고 계속 진행합니다.
성공하고 상위 폴더로 이동하면 deb 파일들이 보입니다.
먼저 java-common을 설치하여 주시고 패키지 의존성에 맞게 순서대로 설치 하시면 됩니다.
2012년 9월 18일 화요일
2012년 8월 1일 수요일
ODROID-X rooting & with GMS(11-14-2012) ICS
2012-11-14 이미지 입니다.
수정 사항
1. kernel
- kernel 3.0.51 merge
- PL2302(USB Serial driver) 추가
- TMU 지원
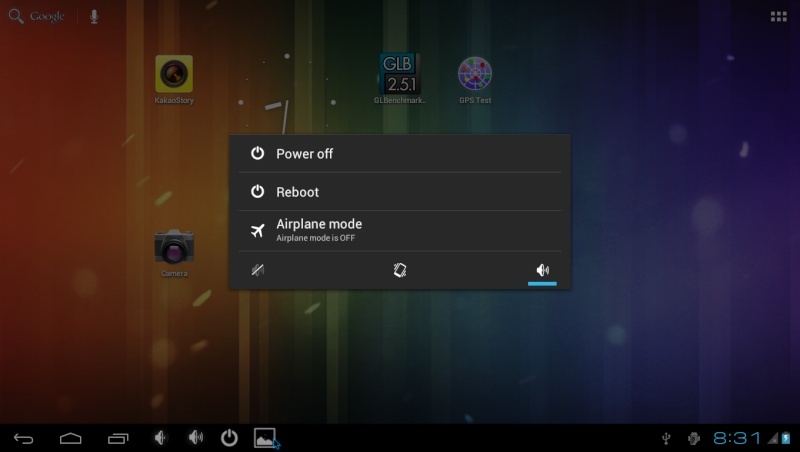
2. Global Actions에 Reboot item 추가
3. HDMI UI 회전
4. Camera
- 5M pixel 촬영
- 720p 녹화
- AF 지원
2012-11-13 이미지 입니다.
1. PL2303 드라이버 built-in
https://www.dropbox.com/s/xrhzuaz7cqjjzz3/ODROID-X%281.6%29%20with%20GMS%28rooting%29.zip
2012-11-06 이미지 입니다.
1. Navigation Bar의 Shutdown시 reboot 추가
2012-10-24 이미지 입니다.
1. HDMI 화면 떨림 수정
2. Navigation Bar에 Volume Up/Down, Power Off, Screen Shot Button 추가
3. USB Mass Storage mount 안 된는 문제 수정.
4. ADK(Android Open accessory development Kit) 지원
5. 외장 USB GPS(ttyACM0, ttyUSB0) 지원
6. Settings -> Storage 버그 수정.
7. busybox 포함.
SD Card Image
https://www.dropbox.com/s/xrhzuaz7cqjjzz3/ODROID-X%281.6%29%20with%20GMS%28rooting%29.zip
eMMC Images
https://www.dropbox.com/sh/jplggdkpma6iac5/-QKlcw_qbP

2012-10-11 이미지 입니다.
https://www.dropbox.com/s/xrhzuaz7cqjjzz3/ODROID-X%281.6%29%20with%20GMS%28rooting%29.zip
kernel 3.0.42
http://odroid.foros-phpbb.com/t1159-kernel-v441-overclock-update-06-09-12-monitoring-app
2012/09/27 4x12 BSP
apk 포함
Terminal-v1.0.apk
ODROID-4.0-v1.9.apk
odroidInfo.apk
PowerOff.apk
enable static MAC Address.
kernel에 hdmi switch event 제거로 hdmi 연결 되어 있어도 volume 조절 가능 하도록 수정.
HDMI 동영상 aspect ratio 변경 가능
---------------------------------------------------------------------------------------------------------
1. Jelly Bean
2. Rooting
3. GMS installed
4. fat 파티션 줄임.
비디오 재생은 되나 화면과 정상적인 재생은 안됨
Wifi 없으면 Google 인증을 받을 수 없음
1.6GHz
https://www.dropbox.com/s/zj7hn7p52quvh2a/ODROID-X%281.6%29%20with%20GMS%28rooting%29%20JB.zip
1.8GHz
https://www.dropbox.com/s/r1lik3wgjlrrgxm/ODROID-X%281.8%29%20with%20GMS%28rooting%29%20JB.zip
ODROID-X Google Mobile Service를 포함하고 rooting이 되어 있는 복구 이미지 입니다.
여기에 rooting을 위한 파일이 있습니다.
http://www.unlockroot.com/
링크가 깨져 있어서 dropbox에 올렸습니다.
https://www.dropbox.com/s/7vxb7pfoq3453zm/unlockroot23.zip
Image Writer라는 open source project를 이용하여 ODROID-X 이미지를 SD Card에 write하면 됩니다.
https://launchpad.net/win32-image-writer/
복구 이미지 링크 입니다.
1.8GHz
https://www.dropbox.com/s/zjkyy9uktp5kcjj/ODROID-X%281.8%29%20with%20GMS%28rooting%29.zip
1.6 GHz
https://www.dropbox.com/s/xrhzuaz7cqjjzz3/ODROID-X%281.6%29%20with%20GMS%28rooting%29.zip
변경 사항
ttyACM0, ttyUSB0로 연결되는 외장 GPS 지원함
SD로 부팅 시 eMMC 인식 되지 않음
내부 저장 메모리 마운트 안 되는 문제 수정
Rooting
GMS 설치
About Kernel 4.2
There are some new stuff that must be defined on the config file. I've let my own config to compare and on odroidx_android_defconfig everything that changed is marked with 4.2 String. if you search the file for 4.2 you'll see the modifications on odroidx_android_defconfig.
Also, I've ommited on changelogs:
On my config you'll see an option to 1.8Ghz, one to 1.6Ghz and a Option to 533Mhz on Mali.
Here the current change list of the upcoming kernel version:
Improovments on s5p hdmi stuff
memcopy from glibc
string from glibc
scheduler performance: if the user sets it up it will power up all the 4 cores on switcching, if the user switchs off this he'll try to shutdown.
Added the CONFIG_MALI_GPU_OVERCLOCK_533MHZ to the config
Reduced the time that MALI takes to changed frequencies from 1sec to 100msec.
Merge error in cpupower driver
RCU: Joe's RCU
mm.h: increase readahead value from 128kb to 2048kb
sched: don't call task_group() many times in set_task_rq() - Improves performance, better if autogroup is enabled.
ARM: SMP: use a timing out completion for cpu hotplug - from Russel King
Little trick on slub.c to get some performance
Add dynamic writeback feature from 3.1
Added optimized ARM RWSEM algorithm.
lib/sha1: use the git implementation of SHA-1 (10 to 15% faster boot times)
Remove ARM sha1 routines (as the update above make's it obsolet)
Prevent aliased requests from starving other I/O
I/O-less dirty throttling, reduce filesystem writeback from page reclaim - backport from 3.2
writeback: Add a 'reason' to wb_writeback_work
fs/sync.c: add module_param to enable/disable fsync() calls. Its enabled by default. Let me explain this a little more.
- When you write something to disk either you just write and bye or you write and wait until the confirmation is made.
- By default I left this enable as its the default. If you disable it you'll get more performance but (HUGE WARNING).
- If you writed something to disk and you power off your board, you have a huge chance of data corruption. So, only turn this off if you can assure
- that you will turn off your board properly.
--- BELOW ARM PATCH's from Vicent Guittot!!! ---
ARM: 7011/1: Add ARM cpu topology definition
sched: Ensure cpu_power periodic update
ARM: topology: save cpu id of each core
ARM: topology: Update topology according to current sched_mc mode
ARM: 7182/1: ARM cpu topology: fix warning
ARM: topology: Add a cpu_power function
ARM: topology: Add a topology update notification
ARM: cpu topology: Add asym topology flag for using cpu0 1st
ARM: cpu topology: add debugfs
cpupower: update the cpu_power according to cpu load
sched: use cpu capacity to decide if a ILB is needed
2012-09-05 이미지 입니다.
What's new! (Changes against Alpha 3)
- EDID feature is removed and there are 2 ways of HDMI resolution setting for better monitor compatibility. 1) 1080p/720p selection with Jumper setting. 2) If you press down "USER" button(SW3) when you plug HDMI connector after booting, resolution will be 1080p regardless of Jumper setting.- Wrong SD/eMMC mounting issue is fixed. 1) If you boot from SD card, you can't access eMMC. 2) If you boot from eMMC, you can access SD card via /mnt/ext_sd- Bluetooth stereo headset issue is fixed- USB storage is mounted on /mnt/ext_usb automatically.- ODROID app is pre-installed. This app is useful for platform developement as well as system test. Special thanks to Alvaro.- DicePlayer app us pre-installed. This app is the greatest multimedia player which utilizes hardware acceleator. If you want to know about it visit here : https://play.google.com/store/apps/details?id=com.inisoft.mediaplayer.a&hl=en There is a patch file for XBMC to work with this great app. Special thanks to INISOFT.
2012-08-28 이미지 입니다.
- mdrjr's Great Kernel v4.1 (3.0.41) merged
- CPU clock is set to 1.4Ghz (DVFS range is 200Mhz ~ 1400Mhz)
- GPU clock is changed to 440Mhz from 400Mhz
- eMMC clock is changed from 33Mhz to 50Mhz (U-boot & Kernel must be updated)
- SD clock is changed from 44Mhz to 50Mhz (U-boot & Kernel must be updated)
- HDMI overlay is implemented (Movie playback doesn't hide Android UI anymore)
- HDMI EDID feature returns with better compatibility (Software driven accurate I2C, 720p/1080p jumper setting is useless perhaps)
- HDMI flickering is almost gone even VDFS/CPU-Hotplug are enabled.
- USB mass storage is mountable on /mnt/ext_usb. (Supports FAT32/NTFS, But NTFS is read only)
- booted by eMMC, SD Card Slot is External Storage, mounted /mnt/ext_sd. (Supports FAT32/NTFS, But NTFS is read only)
- Screen rotation lock is configurable in Settings. It makes better compatibility in HDMI display.
- Improved PMIC device driver
- Bluetooth stereo headset support (A2DP is implemented)
- Experimental MS Kinect driver (You can develop OpenCV/OpenGL/OpenNI stuff)
- uinput driver is built-in kernel image for various input method i.e. DroidMote.
- Rooting is default. (But, Preloaded GMS is not allowed legally by Google)
https://www.dropbox.com/s/n9cmddou12zd4x4/ODROID-X%20with%20GMS%28rooting%29.zip
2012년 7월 21일 토요일
ICS에서 mouse right click 시 back button 처럼 동작하기
Ginger Bread에서 USB Mouse에서 Right Click은 Back, Wheel은 Menu로 동작 하였습니다.
하지만 ICS부터는 모두 click으로 처리가 됩니다. Screen key(Navigation bar) 때문에 따로 mouse에 right가 Back button으로 동작하지 않아도 안드로이드를 사용할 수 있기 때문으로 판단됩니다.
그래도 Right Click이 Mouse Back Button 처럼 동작하는게 편합니다.
framework/base/services/input/InputReader.cpp를 아래와 같이 수정 하면 됩니다.
하지만 ICS부터는 모두 click으로 처리가 됩니다. Screen key(Navigation bar) 때문에 따로 mouse에 right가 Back button으로 동작하지 않아도 안드로이드를 사용할 수 있기 때문으로 판단됩니다.
그래도 Right Click이 Mouse Back Button 처럼 동작하는게 편합니다.
framework/base/services/input/InputReader.cpp를 아래와 같이 수정 하면 됩니다.
1077 void CursorButtonAccumulator::process(const RawEvent* rawEvent) {
1078 if (rawEvent->type == EV_KEY) {
1079 switch (rawEvent->scanCode) {
1080 case BTN_LEFT:
1081 mBtnLeft = rawEvent->value;
1082 break;
1083 case BTN_RIGHT:
1084 //codewalker
1085 //mBtnRight = rawEvent->value;
1086 mBtnBack = rawEvent->value;
2012년 7월 5일 목요일
android (Mass Storage)PC에 자동 마운트 하기
android에서 MTP가 아닌 Mass Storage 방식의 경우 USB 연결 시 자동으로 Mount하려고 합니다.
framework/base/packages/SystemUI/src/com/android/systemui/usb/StorageNotification.java
framework/base/packages/SystemUI/src/com/android/systemui/usb/StorageNotification.java
95
96 private void onUsbMassStorageConnectionChangedAsync(boolean connected) {
97 mUmsAvailable = connected;
98 /*
99 * Even though we may have a UMS host connected, we the SD card
100 * may not be in a state for export.
101 */
102 String st = Environment.getExternalStorageState();
103
104 Slog.i(TAG, String.format("UMS connection changed to %s (media state %s)", connected, st));
105
106 if (connected && (st.equals(
107 Environment.MEDIA_REMOVED) || st.equals(Environment.MEDIA_CHECKING))) {
108 /*
109 * No card or card being checked = don't display
110 */
111 connected = false;
112 }
113 updateUsbMassStorageNotification(connected);
114
115 mStorageManager.enableUsbMassStorage();
116 }
위와 같이 수정하면 USB 연결 시 자동으로 Mass Storage가 PC에 연결 됩니다.
2012년 6월 21일 목요일
부팅 후 동영상 재생 시키기
android에서 부팅 후 바로 동영상을 재생 시켜 보겠습니다.
BOOT_COMPLETED로 googling 하면 관련 내용을 많이 찾을 수 있습니다.
하지만 고생했던 이유가 Activity가 없이 처리하려고 하니 잘 되지 않았는데 찾았습니다.
아래 코드처럼 Activity가 없으면 receiver에 추가해 줘야 합니다.
<action android:name="android.intent.action.MAIN" />
<category android:name="android.intent.category.LAUNCHER" />
그렇지 않으면 application 자체가 등록되지 않아서 BOOT_COMPLETED를 받을 수 없습니다.
<?xml version="1.0" encoding="utf-8"?>
<manifest xmlns:android="http://schemas.android.com/apk/res/android"
package="com.hardkernel.odroid"
android:versionCode="1"
android:versionName="1.0"
android:installLocation="internalOnly">
<uses-sdk android:minSdkVersion="10" />
<uses-permission android:name="android.permission.RECEIVE_BOOT_COMPLETED" />
<application
android:icon="@drawable/ic_launcher"
android:label="@string/app_name" >
<receiver
android:name="com.hardkernel.odroid.BootReceiver" >
<intent-filter>
<action android:name="android.intent.action.BOOT_COMPLETED"/> <action android:name="android.intent.action.WALLPAPER_CHANGED"/> <action android:name="android.intent.action.MAIN" /> <category android:name="android.intent.category.LAUNCHER" /> </intent-filter>
</receiver>
</application>
</manifest>
그리고 매번 부팅하여 동작하는지 확인하기 힘들어서 아래 코드를 추가하여 배경화면을 바꿔도 동일하게 BootReceiver class의 onReceive()이 호출 되는 걸 확인 할 수 있습니다.
<action android:name="android.intent.action.WALLPAPER_CHANGED"/>
그리고 이제 동영상을 재생 시켜 보는 코드 입니다.
public class BootReceiver extends BroadcastReceiver {
@Override
public void onReceive(Context context, Intent intent) {
// TODO Auto-generated method stub
Intent tostart = new Intent(Intent.ACTION_VIEW);
File wonder_girls = new File("/sdcard/Wonder.mp4");
tostart.setDataAndType(Uri.fromFile(wonder_girls), "video/*");
tostart.setFlags(Intent.FLAG_ACTIVITY_NEW_TASK);
context.startActivity(tostart);
}
}
부팅 후 바로 Wonder.mp4란 동영상이 플레이 됩니다.
물론 배경화면을 바꿔도 동일하게 반응합니다.
2012년 5월 30일 수요일
LOCAL_MODULE_TAGS의 이해
Android.mk에 LOCAL_MODULE_TAGS가 보통 optional로 되어 있다.
LOCAL_MODULE_TAGS := eng user
LOCAL_MODULE_TAGS := eng optional
LOCAL_MODULE_TAGS := user optional
LOCAL_MODULE_TAGS := optional
이 정도의 조합이 가능 할 것이다.
그런데 optional 이 옵션은 어떻게 적용되는 것일까?
device.mk에 PRODUCT_PACKAGES에 영향을 받는다.
물론 build 폴더에 mk 파일들에도 PRODUCT_PACKAGES가 있고 거기에 영향을 받는다.
optional은 LOCAL_MODULE의 내용이 PRODUCT_PACKAGES에 포함되어 있으면 빌드를 하겠다는 의미이다.
LOCAL_MODULE_TAGS := eng optional 이 경우 eng면 반드시 빌드 하고 user면 PRODUCT_PACKAGES에 포함되어 있으면 빌드 한다는 뜻이다.
2012년 5월 15일 화요일
Ubuntu 12.04 on ODROID-PC
Linaro 12.04 Ubuntu를 ODROID-PC에 올려 보겠습니다.
마지막 버전이 12.05으로 X가 동작하지 않아서 12.04로 시도 했습니다.
http://releases.linaro.org/12.04/ubuntu/leb-origen/
아래 사이트에서 필요한 파일을 받습니다.
Download hwpack_linaro-leb-origen_20120426-45_armhf_supported.tar.gz and linaro-precise-ubuntu-desktop-20120426-119.tar.gz from the links below
이미지를 만들기 위해 linaro-media-create를 설치해야 합니다.
https://wiki.linaro.org/Platform/DevPlatform/Ubuntu/ImageInstallation
그리고 rootfs에 /etc/X11/xorg.conf를 아래와 같이 추가하여 주시면 됩니다.
Section "Device"
Identifier "FBDEV"
Driver "fbdev"
Option "fbdev" "/dev/fb1"
EndSection
Section "Screen"
Identifier "HDMI Screen"
Device "FBDEV" DefaultDepth 16
SubSection "Display"
Virtual 1280 720
EndSubSection
EndSection
추가로 SATA로 HDD에 rootfs를 넣어서 부팅해 보았습니다.
HDD의 첫번째 파티션을 ext4로 format하고 rootfs를 넣습니다.
github에 올라가 있는 커널에 SATA가 동작하도록 올렸습니다.
uboot에서 bootargs를 아래와 같이 /dev/sda1로 수정 합니다.
그리고 SATA Driver가 동작하기 위한 시간을 주기 위해 rootdelay=10 로 수정합니다.
setenv bootargs 'root=/dev/sda1 rw rootfstype=ext4 init=/sbin/init console=ttySAC1,115200 rootdelay=10'

마지막 버전이 12.05으로 X가 동작하지 않아서 12.04로 시도 했습니다.
http://releases.linaro.org/12.04/ubuntu/leb-origen/
아래 사이트에서 필요한 파일을 받습니다.
Download hwpack_linaro-leb-origen_20120426-45_armhf_supported.tar.gz and linaro-precise-ubuntu-desktop-20120426-119.tar.gz from the links below
이미지를 만들기 위해 linaro-media-create를 설치해야 합니다.
https://wiki.linaro.org/Platform/DevPlatform/Ubuntu/ImageInstallation
  $ sudo add-apt-repository ppa:linaro-maintainers/tools
  $ sudo apt-get update
  $ sudo apt-get install linaro-image-tools

  # t-flash를 넣고 sudo fdisk -l 을 통해 '/dev/sdX' node를 확인한다.
저의 환경은 /dev/sde입니다.
Building a Custom Image 방법대로 f-flash에 복구합니다.
[~/projects/linaro_ubuntu]$ sudo linaro-media-create --mmc /dev/sde --dev origen --hwpack hwpack_linaro-leb-origen_20120327-1_armel_supported.tar.gz --binary linaro-o-ubuntu-desktop-tar-20120327-0.tar.gz
/usr/lib/pymodules/python2.6/argparse.py:1576: DeprecationWarning: The "version" argument to ArgumentParser is deprecated. Please use "add_argument(..., action='version', version="N", ...)" instead
"""instead""", DeprecationWarning)
I see...
Device Mount point Size
/dev/sda none 610480MB
/dev/sda1 / 95366MB
/dev/sda2 none 515112MB
/dev/sda5 none 10869MB
/dev/sda6 /home 504243MB
/dev/sdb none 476940MB
/dev/sdb1 none 476937MB
/dev/sdc none 0MB
/dev/sdd none 0MB
/dev/sde none 7647MB
/dev/sde1 none 5827MB
/dev/sde2 none 515MB
/dev/sde3 none 1030MB
/dev/sde4 none 134MB
Are you 100% sure, on selecting [/dev/sde] (y/n)? y
...
ODROID-PC는 LCD가 없고 HDMI만 있습니다.
따라서 HDMI 출력이 되도록 kernel에 작업해야 합니다.
Linaro에서 Origen 보드에 HDMI 출력이 가능하도록 작업을 하였습니다.
Origen의 kernel을 ODROID-PC의 H/W에 맞게 수정해 줘야 합니다.
tobetter님이 이 작업을 해주셨고 github에 올려 해 주셨습니다.
https://github.com/tobetter/hardkernel-linux
$ git clone git://github.com/tobetter/hardkernel-linux.git
Cloning into hardkernel-linux...
$make hardkernel_ubuntu_defconfig
make -j6 후 만들어진 zImage를 fastboot를 이용하여 write합니다.
복구가 끝나면 /dev/sde2를 mount하여 rootfs를 pc로 복사 시킵니다.
android uboot을 사용하지만 partition 확인하는 부분을 제거하여 fastboot가 가능합니다.
http://dev.odroid.com/projects/ics#s-6.3
아래 사이트에서 uboot 소스를 받으시고 아래와 같이 고칩니다.
http://com.odroid.com/sigong/nf_file_board/nfile_board_view.php?keyword=&tag=&bid=94
common/cmd_fastboot.c
...
ptable[pcount].length = PART_SIZE_ROOTFS;
ptable[pcount].flags = FASTBOOT_PTENTRY_FLAGS_USE_MOVI_CMD;
pcount++;
#if 0
/* System */
get_mmc_part_info(dev_num, 2, &start, &count, &pid);
if (pid != 0x83)
...
ptable[pcount].length = count * CFG_FASTBOOT_SDMMC_BLOCKSIZE;
ptable[pcount].flags = FASTBOOT_PTENTRY_FLAGS_USE_MMC_CMD;
pcount++;
#endif
#if 1 // Debug
fastboot_flash_dump_ptn();
ODROID-PC는 LCD가 없고 HDMI만 있습니다.
따라서 HDMI 출력이 되도록 kernel에 작업해야 합니다.
Linaro에서 Origen 보드에 HDMI 출력이 가능하도록 작업을 하였습니다.
Origen의 kernel을 ODROID-PC의 H/W에 맞게 수정해 줘야 합니다.
tobetter님이 이 작업을 해주셨고 github에 올려 해 주셨습니다.
https://github.com/tobetter/hardkernel-linux
$ git clone git://github.com/tobetter/hardkernel-linux.git
Cloning into hardkernel-linux...
$make hardkernel_ubuntu_defconfig
make -j6 후 만들어진 zImage를 fastboot를 이용하여 write합니다.
Linaro Ubuntu의 rootfs가 매우 크기 때문에 ODROID-PC의 partition table을 다시 만들어야 합니다.
[~/projects/linaro_ubuntu]$ sudo fdisk /dev/sde
WARNING: DOS-compatible mode is deprecated. It's strongly recommended to
switch off the mode (command 'c') and change display units to
sectors (command 'u').
Command (m for help): p
Disk /dev/sde: 8018 MB, 8018460672 bytes
255 heads, 60 sectors/track, 1023 cylinders
Units = cylinders of 15300 * 512 = 7833600 bytes
Sector size (logical/physical): 512 bytes / 512 bytes
I/O size (minimum/optimal): 512 bytes / 512 bytes
Disk identifier: 0x00000000
Device Boot Start End Blocks Id System
/dev/sde1 235 1014 5967000 c W95 FAT32 (LBA)
/dev/sde2 10 78 527850 83 Linux
/dev/sde3 79 216 1055700 83 Linux
/dev/sde4 217 234 137700 83 Linux
Partition table entries are not in disk order
ODROID-A의 Partition입니다.
Command (m for help): d
Partition number (1-4): 1
Command (m for help): d
Partition number (1-4): 2
Command (m for help): d
Partition number (1-4): 3
Command (m for help): d
Selected partition 4
partition을 다 지웁니다.
Command (m for help): n
Command action
e extended
p primary partition (1-4)
p
Partition number (1-4): 2
First cylinder (1-1023, default 1): 11
Last cylinder, +cylinders or +size{K,M,G} (11-1023, default 1023): +4G
Command (m for help): p
Disk /dev/sde: 8018 MB, 8018460672 bytes
255 heads, 60 sectors/track, 1023 cylinders
Units = cylinders of 15300 * 512 = 7833600 bytes
Sector size (logical/physical): 512 bytes / 512 bytes
I/O size (minimum/optimal): 512 bytes / 512 bytes
Disk identifier: 0x00000000
Device Boot Start End Blocks Id System
/dev/sde2 11 559 4199850 83 Linux
11번 cylinder부터 2번째 partition을 하나 만듭니다. 이 영역에 rootfs를 복사 할 것입니다.
Command (m for help): n
Command action
e extended
p primary partition (1-4)
p
Partition number (1-4): 1
First cylinder (1-1023, default 1): 560
Last cylinder, +cylinders or +size{K,M,G} (560-1023, default 1023):
Using default value 1023
Command (m for help): p
Disk /dev/sde: 8018 MB, 8018460672 bytes
255 heads, 60 sectors/track, 1023 cylinders
Units = cylinders of 15300 * 512 = 7833600 bytes
Sector size (logical/physical): 512 bytes / 512 bytes
I/O size (minimum/optimal): 512 bytes / 512 bytes
Disk identifier: 0x00000000
Device Boot Start End Blocks Id System
/dev/sde1 560 1023 3549600 83 Linux
/dev/sde2 11 559 4199850 83 Linux
그리고 vfat으로 만들 partition을 만듭니다.
Command (m for help): m
Command action
a toggle a bootable flag
b edit bsd disklabel
c toggle the dos compatibility flag
d delete a partition
l list known partition types
m print this menu
n add a new partition
o create a new empty DOS partition table
p print the partition table
q quit without saving changes
s create a new empty Sun disklabel
t change a partition's system id
u change display/entry units
v verify the partition table
w write table to disk and exit
x extra functionality (experts only)
Command (m for help): t
Partition number (1-4): 1
Hex code (type L to list codes): l
0 Empty 24 NEC DOS 81 Minix / old Lin bf Solaris
1 FAT12 39 Plan 9 82 Linux swap / So c1 DRDOS/sec (FAT-
2 XENIX root 3c PartitionMagic 83 Linux c4 DRDOS/sec (FAT-
3 XENIX usr 40 Venix 80286 84 OS/2 hidden C: c6 DRDOS/sec (FAT-
4 FAT16 <32M 41 PPC PReP Boot 85 Linux extended c7 Syrinx
5 Extended 42 SFS 86 NTFS volume set da Non-FS data
6 FAT16 4d QNX4.x 87 NTFS volume set db CP/M / CTOS / .
7 HPFS/NTFS 4e QNX4.x 2nd part 88 Linux plaintext de Dell Utility
8 AIX 4f QNX4.x 3rd part 8e Linux LVM df BootIt
9 AIX bootable 50 OnTrack DM 93 Amoeba e1 DOS access
a OS/2 Boot Manag 51 OnTrack DM6 Aux 94 Amoeba BBT e3 DOS R/O
b W95 FAT32 52 CP/M 9f BSD/OS e4 SpeedStor
c W95 FAT32 (LBA) 53 OnTrack DM6 Aux a0 IBM Thinkpad hi eb BeOS fs
e W95 FAT16 (LBA) 54 OnTrackDM6 a5 FreeBSD ee GPT
f W95 Ext'd (LBA) 55 EZ-Drive a6 OpenBSD ef EFI (FAT-12/16/
10 OPUS 56 Golden Bow a7 NeXTSTEP f0 Linux/PA-RISC b
11 Hidden FAT12 5c Priam Edisk a8 Darwin UFS f1 SpeedStor
12 Compaq diagnost 61 SpeedStor a9 NetBSD f4 SpeedStor
14 Hidden FAT16 <3 63 GNU HURD or Sys ab Darwin boot f2 DOS secondary
16 Hidden FAT16 64 Novell Netware af HFS / HFS+ fb VMware VMFS
17 Hidden HPFS/NTF 65 Novell Netware b7 BSDI fs fc VMware VMKCORE
18 AST SmartSleep 70 DiskSecure Mult b8 BSDI swap fd Linux raid auto
1b Hidden W95 FAT3 75 PC/IX bb Boot Wizard hid fe LANstep
1c Hidden W95 FAT3 80 Old Minix be Solaris boot ff BBT
1e Hidden W95 FAT1
Hex code (type L to list codes): c
Changed system type of partition 1 to c (W95 FAT32 (LBA))
vfat으로 변환합니다.
Command (m for help): w
The partition table has been altered!
Calling ioctl() to re-read partition table.
WARNING: If you have created or modified any DOS 6.x
partitions, please see the fdisk manual page for additional
information.
Syncing disks.
저장하고 나옵니다.
[~/projects/linaro_ubuntu]$ sudo mkfs.ext4 /dev/sde2
mke2fs 1.41.11 (14-Mar-2010)
Filesystem label=
OS type: Linux
Block size=4096 (log=2)
Fragment size=4096 (log=2)
Stride=0 blocks, Stripe width=0 blocks
262944 inodes, 1049962 blocks
52498 blocks (5.00%) reserved for the super user
First data block=0
Maximum filesystem blocks=1077936128
33 block groups
32768 blocks per group, 32768 fragments per group
7968 inodes per group
Superblock backups stored on blocks:
32768, 98304, 163840, 229376, 294912, 819200, 884736
Writing inode tables: done
Creating journal (32768 blocks): done
Writing superblocks and filesystem accounting information: done
This filesystem will be automatically checked every 35 mounts or
180 days, whichever comes first. Use tune2fs -c or -i to override.
[~/projects/linaro_ubuntu]$ sudo mkfs.vfat /dev/sde1
mkfs.vfat 3.0.7 (24 Dec 2009)
[~/projects/linaro_ubuntu]$
두 partition을 format합니다.
[~/projects/linaro_ubuntu]$ sudo mount /dev/sde2 /media/microSD/
[~/projects/linaro_ubuntu]$ sudo cp -a rootfs/* /media/microSD/
복사해 놓은 rootfs를 t-flash에 복사합니다.
uboot에서 bootargs와 bootcmd를 아래와 같이 수정 합니다.
EXYNOS4 # setenv bootcmd 'movi read kernel 0 40008000;bootm 40008000'
EXYNOS4 # setenv bootargs 'root=/dev/mmcblk0p2 rw rootfstype=ext4 init=/sbin/init console=ttySAC2,115200 rootdelay=1'
EXYNOS4 # setenv bootargs 'root=/dev/mmcblk0p2 rw rootfstype=ext4 init=/sbin/init console=ttySAC2,115200 rootdelay=1'
EXYNOS4 # sav
EXYNOS4 # pri
baudrate=115200
bootargs=root=/dev/mmcblk0p2 rw rootfstype=ext4 init=/sbin/init console=ttySAC21
bootcmd=movi read kernel 0 40008000;bootm 40008000
bootdelay=1
ethaddr=00:40:5c:26:0a:5b
gatewayip=192.168.0.1
ipaddr=192.168.0.20
netmask=255.255.255.0
serverip=192.168.0.10
Environment size: 309/16380 bytes
EXYNOS4 # boot
그리고 rootfs에 /etc/X11/xorg.conf를 아래와 같이 추가하여 주시면 됩니다.
Section "Device"
Identifier "FBDEV"
Driver "fbdev"
Option "fbdev" "/dev/fb1"
EndSection
Section "Screen"
Identifier "HDMI Screen"
Device "FBDEV" DefaultDepth 16
SubSection "Display"
Virtual 1280 720
EndSubSection
EndSection
추가로 SATA로 HDD에 rootfs를 넣어서 부팅해 보았습니다.
HDD의 첫번째 파티션을 ext4로 format하고 rootfs를 넣습니다.
github에 올라가 있는 커널에 SATA가 동작하도록 올렸습니다.
uboot에서 bootargs를 아래와 같이 /dev/sda1로 수정 합니다.
그리고 SATA Driver가 동작하기 위한 시간을 주기 위해 rootdelay=10 로 수정합니다.
setenv bootargs 'root=/dev/sda1 rw rootfstype=ext4 init=/sbin/init console=ttySAC1,115200 rootdelay=10'

피드 구독하기:
글 (Atom)